A global product attribute is an attribute that you can use for any product in your WooCommerce store. For example, you can create a global product attribute called Color and assign different colors to your products, such as red, blue, green, etc.
Global product attributes can be found and managed in the menu Products > Attributes. You can learn more about it in the documentation of managing global product attributes.
Table of Contents
Create a global product attribute
To create a global product attribute in WooCommerce, you need to follow these steps:
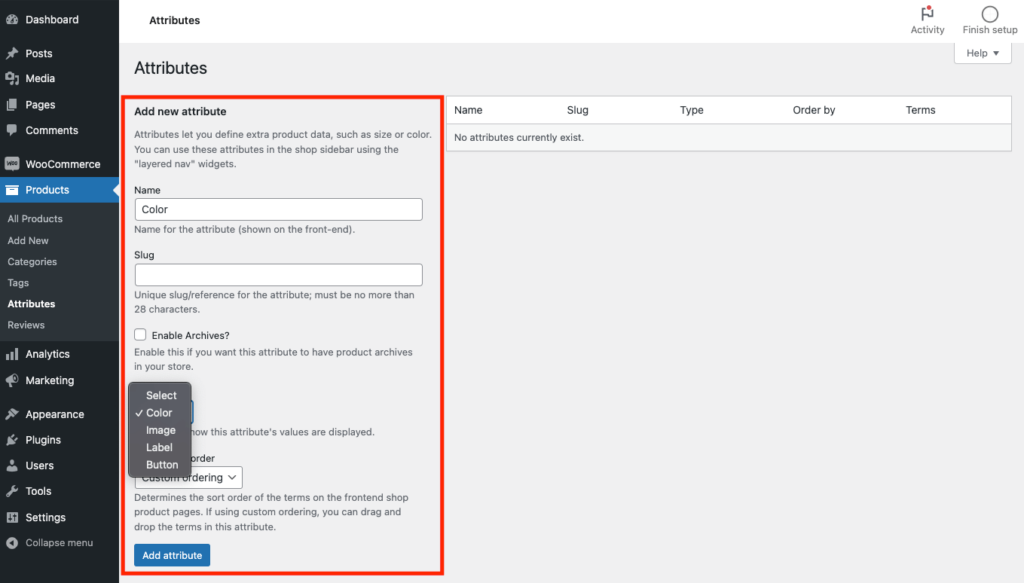
- From the WordPress dashboard, go to Products > Attributes.
- Enter a name and a slug (optional) for the attribute in the respective fields. The name is what you and your customers will see on the product page, and the slug is what will be used in the URL. For example, if you want to create an attribute for color, you can enter “Color” as the name and “color” as the slug.
- Choose a type for the attribute from the drop-down menu. The type determines how the attribute swatches will be displayed. The available types are:
- Select: The attribute terms will be displayed as a drop-down menu.
- Color: The attribute terms will be displayed as color swatches.
- Image: The attribute terms will be displayed as image swatches.
- Label: The attribute terms will be displayed as label swatches.
- Button: The attribute terms will be displayed as buttons.
- Click on the Add attribute button to complete.
Update swatch type for an existing attribute
To change the swatch type for a global product attribute, you can follow these steps:
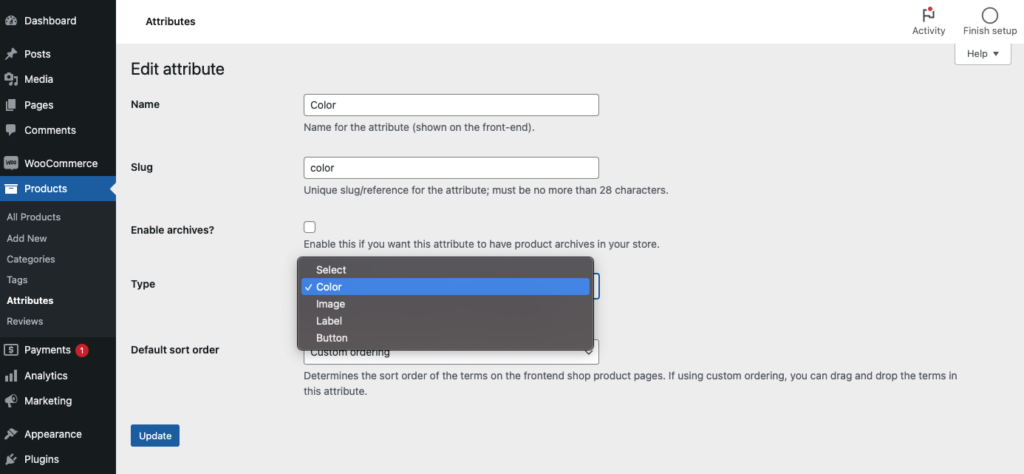
- Go to Products > Attributes and find the attribute that you want to change the swatch type. Click on the Edit link under the attribute name.

- You will see the option Type where you can select the type of that attribute. It is the type of attribute swatches too.
Configure swatches for a global product attribute
To configure swatches for a global product attribute, you can follow these steps:
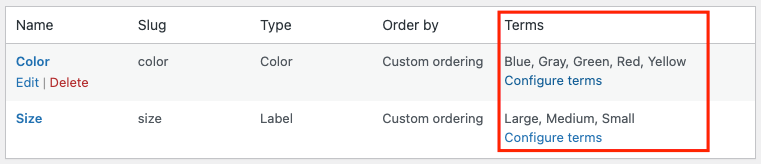
- Go to Products > Attributes and find the attribute that you want to configure swatches for. Click on the Configure terms link in the Terms column. Don’t worry if you see no term in this column. You can add new ones by following the next step.
- You will see a list of terms for the attribute on the right table. Each term represents an option for the attribute. On the left side, you will see the form to add a new term.
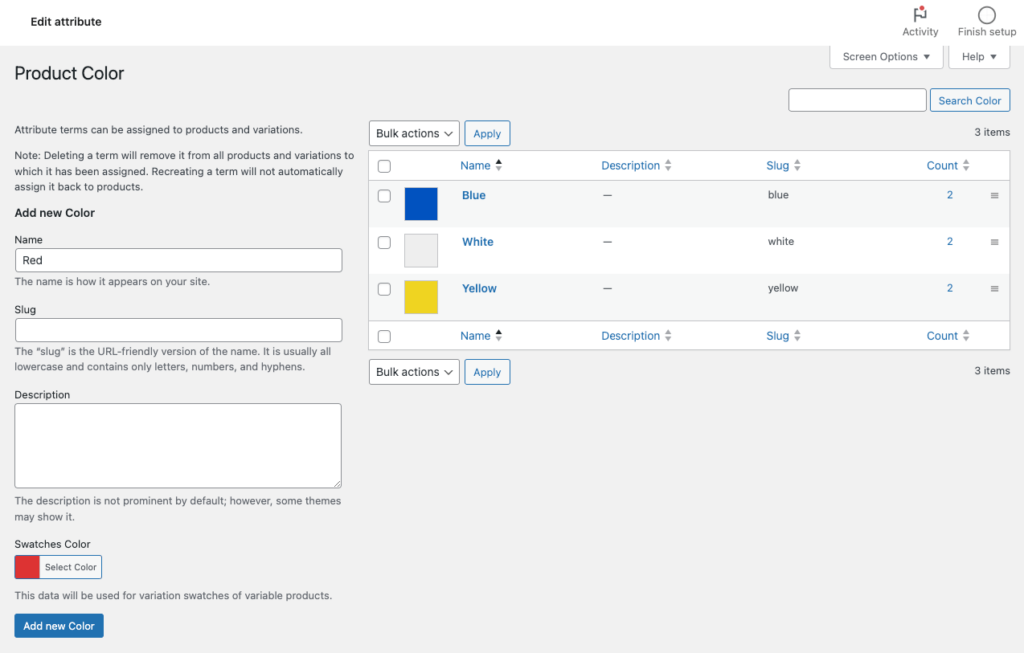
- To add a new term, you will need to fill the form with the following fields:
- Name: This is the name of the term that will be displayed on the frontend and the backend. For example, if the attribute is Color, you can enter names like Red, Blue, Green, etc. You can use any name that makes sense for your products and customers.
- Slug: This is the unique identifier of the term that will be used in the URL. It is usually a lowercase version of the name with hyphens instead of spaces. For example, if the name is Red, the slug can be red. You can also leave this field blank and WordPress will generate a slug for you based on the name.
- Depending on the type of the attribute, you will see different options to set the value for the swatch.
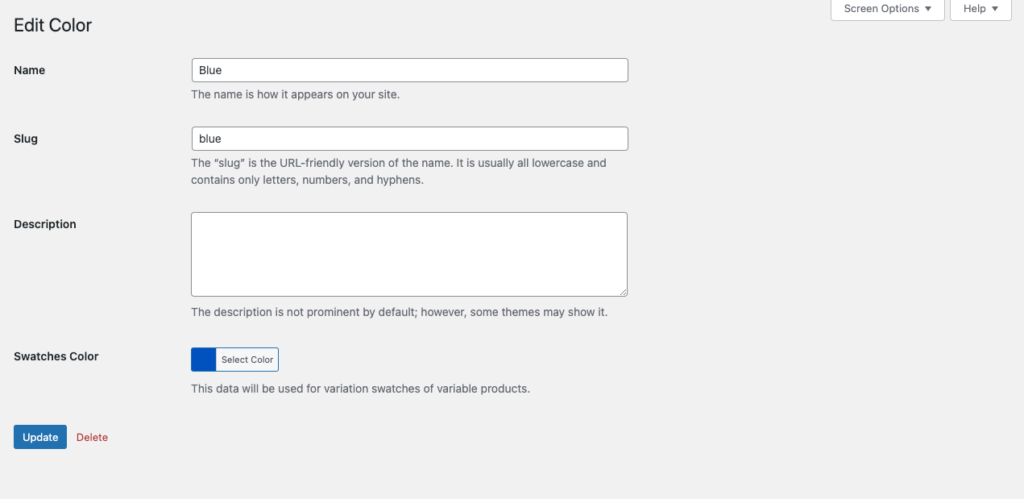
– If the attribute type is Color: you will see a Color field where you can pick the color for the term.
– If the attribute type is Image: you will see an Image field where you can upload an image from your media library or select an existing one.
– If the attribute type is Label: you will see a Label field where you can enter the text that you want to display on the swatch, such as S, M, L, etc.
– If the attribute type is Select or Button: you will not see the additional field, instead the term’s Name will be used.
- You can also edit the term by clicking on the Edit link under the term name. A form will appear that allows you to change the term’s details, including the color, image, or label, depending on the attribute’s type.