Showing variation swatches on your shop page isn’t just about looking good – it’s about creating a smoother shopping experience. When customers can see all their options at a glance, they’re more likely to find what they want and make a purchase. It’s like giving your online store a boost of user-friendliness and visual appeal all at once.
With online stores, how you present your products matters. Big e-commerce sites know this well. That’s why they show product options like colors and sizes right on their shop pages. The good news is your WooCommerce store can now do this too!
In this guide, we’ll walk you through how to add these handy variation swatches to your WooCommerce shop page. Whether you are selling T-shirts in different colors or shoes in various sizes, we have you covered. Let’s dive in and give your store that professional edge!
Table of Contents
Why Show Variation Swatches on the Shop Page?
Before we jump into the how-to, let’s talk about why this is such a game-changer for your online store:
- Better Customer Experience: Your customers can see all options without clicking into each product.
- Eye-Catching Product Listings: Colorful swatches make your products pop. It’s like giving your shop page a mini-makeover.
- Fewer Abandoned Carts: When customers can choose options right from the shop page, they’re more likely to complete their purchase.
- SEO Boost: More engaging product listings can lead to longer visit times, which search engines love.
- Increased Sales: All these benefits add up to one thing – more sales for your store!
Now that you’re excited about the possibilities, let’s make this happen on your WooCommerce site.
How to Show Variations on the Shop Page
You might be wondering if you need to be a coding expert to add variation swatches to your shop page. Good news – you don’t! While it’s possible to show variation swatches using custom code, it requires a deep knowledge of WooCommerce’s code base. We’re going to use a much easier approach – using a plugin.
For this guide, we’ll be using the WCBoost – Variation Swatches plugin (Pro version). This plugin makes it super simple to add and customize variation swatches on your WooCommerce shop page.
Step 1: Install Plugin and Set Up Product Swatches
Let’s start by getting the plugin installed and setting up some basic swatches.
Installing the WooCommerce Variation Swatches Plugin
Once you’ve purchased the Pro version of WCBoost – Variation Swatches, you’ll have the plugin file. Now let’s install it and get it running on your site:
- Go to your WordPress dashboard and navigate to “Plugins > Add New”
- Click on the “Upload Plugin” button, choose the plugin file and click “Install Now”
- After the installation is complete, click “Activate Plugin”
Your plugin is now installed and ready to use. If you need more detailed instructions, don’t forget to check out the online documentation that comes with the plugin.
Setting Up Basic Attribute Swatches
Now you have the plugin installed, let’s set up some swatches for attributes like color and size.
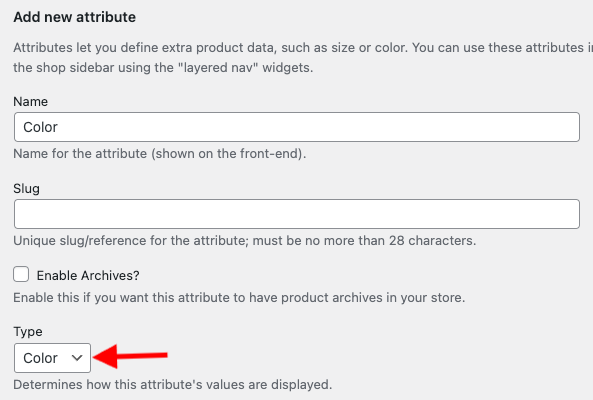
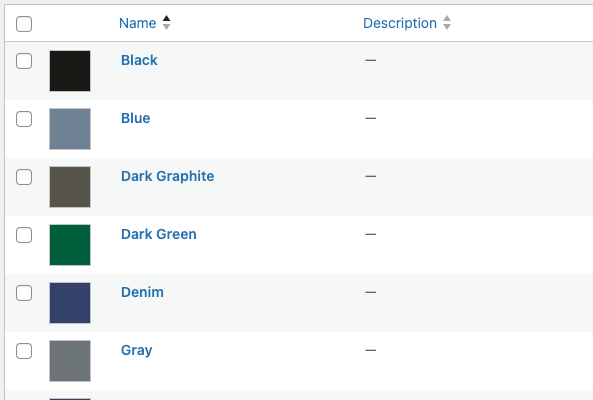
- First, head over to “Products > Attributes” in your WordPress dashboard. Here, you’ll see a list of your product attributes. Let’s say we want to set up a color swatch. Click on the “Color” attribute (or create one if it doesn’t exist).
- In the attribute settings, you’ll notice a new option called “Type”. Change this from the default “Select” to “Color”. This tells WooCommerce that we want to display this attribute as a color swatch. Don’t forget to save your changes!
- Next, we need to set up the individual color options. Click on “Configure terms” and you’ll see a list of your color terms (like “Red”, “Blue”, “Green”, etc.). For each color, click “Edit” and you’ll see a new color picker option. Choose the appropriate color and update the term.
Repeat this process for any other attributes you want to display as swatches. For a “Size” attribute, you might choose the “Label” type instead of “Color”.
Remember, if you need more help with this step, the plugin comes with a detailed tutorial on setting up attribute swatches.
Step 2: Enable Showing Variation Swatches on the Shop Page
Now comes the exciting part – getting attribute swatches to show up on your shop page!
To do this, go to “Appearance > Customize” in your WordPress dashboard. Then open the “WooCommerce > Variation Swatches” section and look for the “Swatches on catalog” setting.
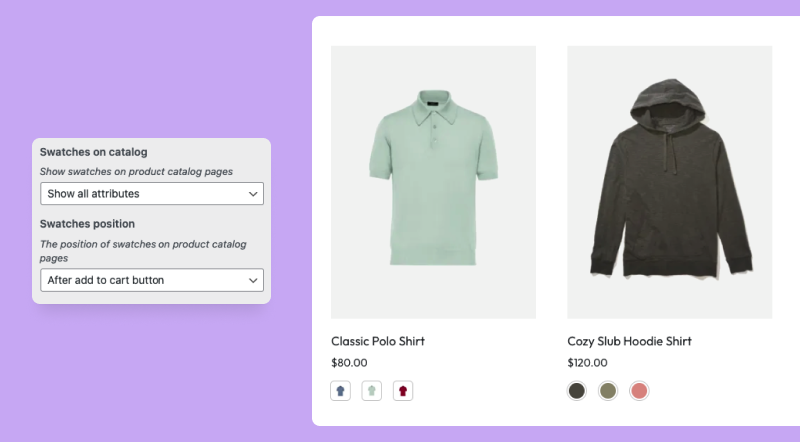
This setting offers a few options for how to display attribute swatches on the shop page:
- Show one attribute: This will display swatches for just one attribute on the shop page. Great if you want to keep things simple.
- Show all attributes: This shows swatches for all available attributes. Perfect if your products have multiple important variations.
- Show selected attribute: This lets you choose which attribute(s) to display. Handy if you have many attributes but only want to show certain ones.
Let’s say we want to show Color swatches on our shop page. We’d choose “Show one attribute” and then select “Color” from the “Default attribute” dropdown. Now, when you visit your shop page, you should see color swatches for each product that has color variations.
For example, if you’re selling t-shirts in different colors, each t-shirt on the shop page will display little color swatches that customers can click to see how the shirt looks in different colors.
Step 3: Customize Variation Swatches on the Shop Page
Now that swatches are showing up on your shop page, you may want to customize them a bit! The WCBoost – Variation Swatches Pro plugin gives you lots of options to customize how your swatches look and work.
Change Position of Swatches in the Product Card
By default, the plugin displays variation swatches below the add-to-cart button of the product card. You can change the position of swatches with the setting “Swatches position”.
In the same Customizer section (WooCommerce > Variation Swatches), find the “Swatches position” setting and choose either option “Before Add to cart button” or “After Add to cart button”.
Change the Size of Swatches on the Shop Page
If your swatches are too big or too small, you can easily resize them. In the same Customizer section, look for “Swatches Size”. Enter your desired size (e.g., 24×24 for slightly larger swatches).
Limit Number of Swatches to be Shown in the Product Card
It is useful if the variation attribute has tons of options. You can limit how many show up to keep things tidy. Find the “Swatches limit” setting and enter a number (e.g., 3 to show only 3 swatches).
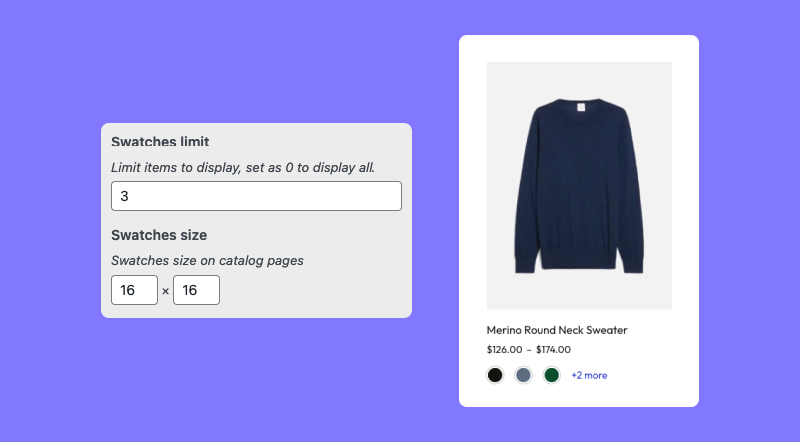
If an attribute has more options than your limit, a “+ more” link will appear. Shoppers can click this to see all options.
Enable Tooltip for Swatches on The Shop Page
Want to give shoppers more info when they hover over a swatch? Turn on tooltips by checking the “Enable tooltip” option. Now, when someone hovers over a swatch, they’ll see the variation name.
Update Product Thumbnail Image When Users Select a Swatch
This cool feature lets the product image change when someone click on a swatch. Find the “Change image on swatches selection” checkbox, check the box to enable it. Now, when a shopper clicks on a color swatch, for example, the product image will update to show that color.
Allow Customers to Buy a Product Variation on the Shop Page
This feature lets customers add a specific variation to their cart right from the shop page. Look for “Update add to cart button” checkbox and select it to enable this feature.
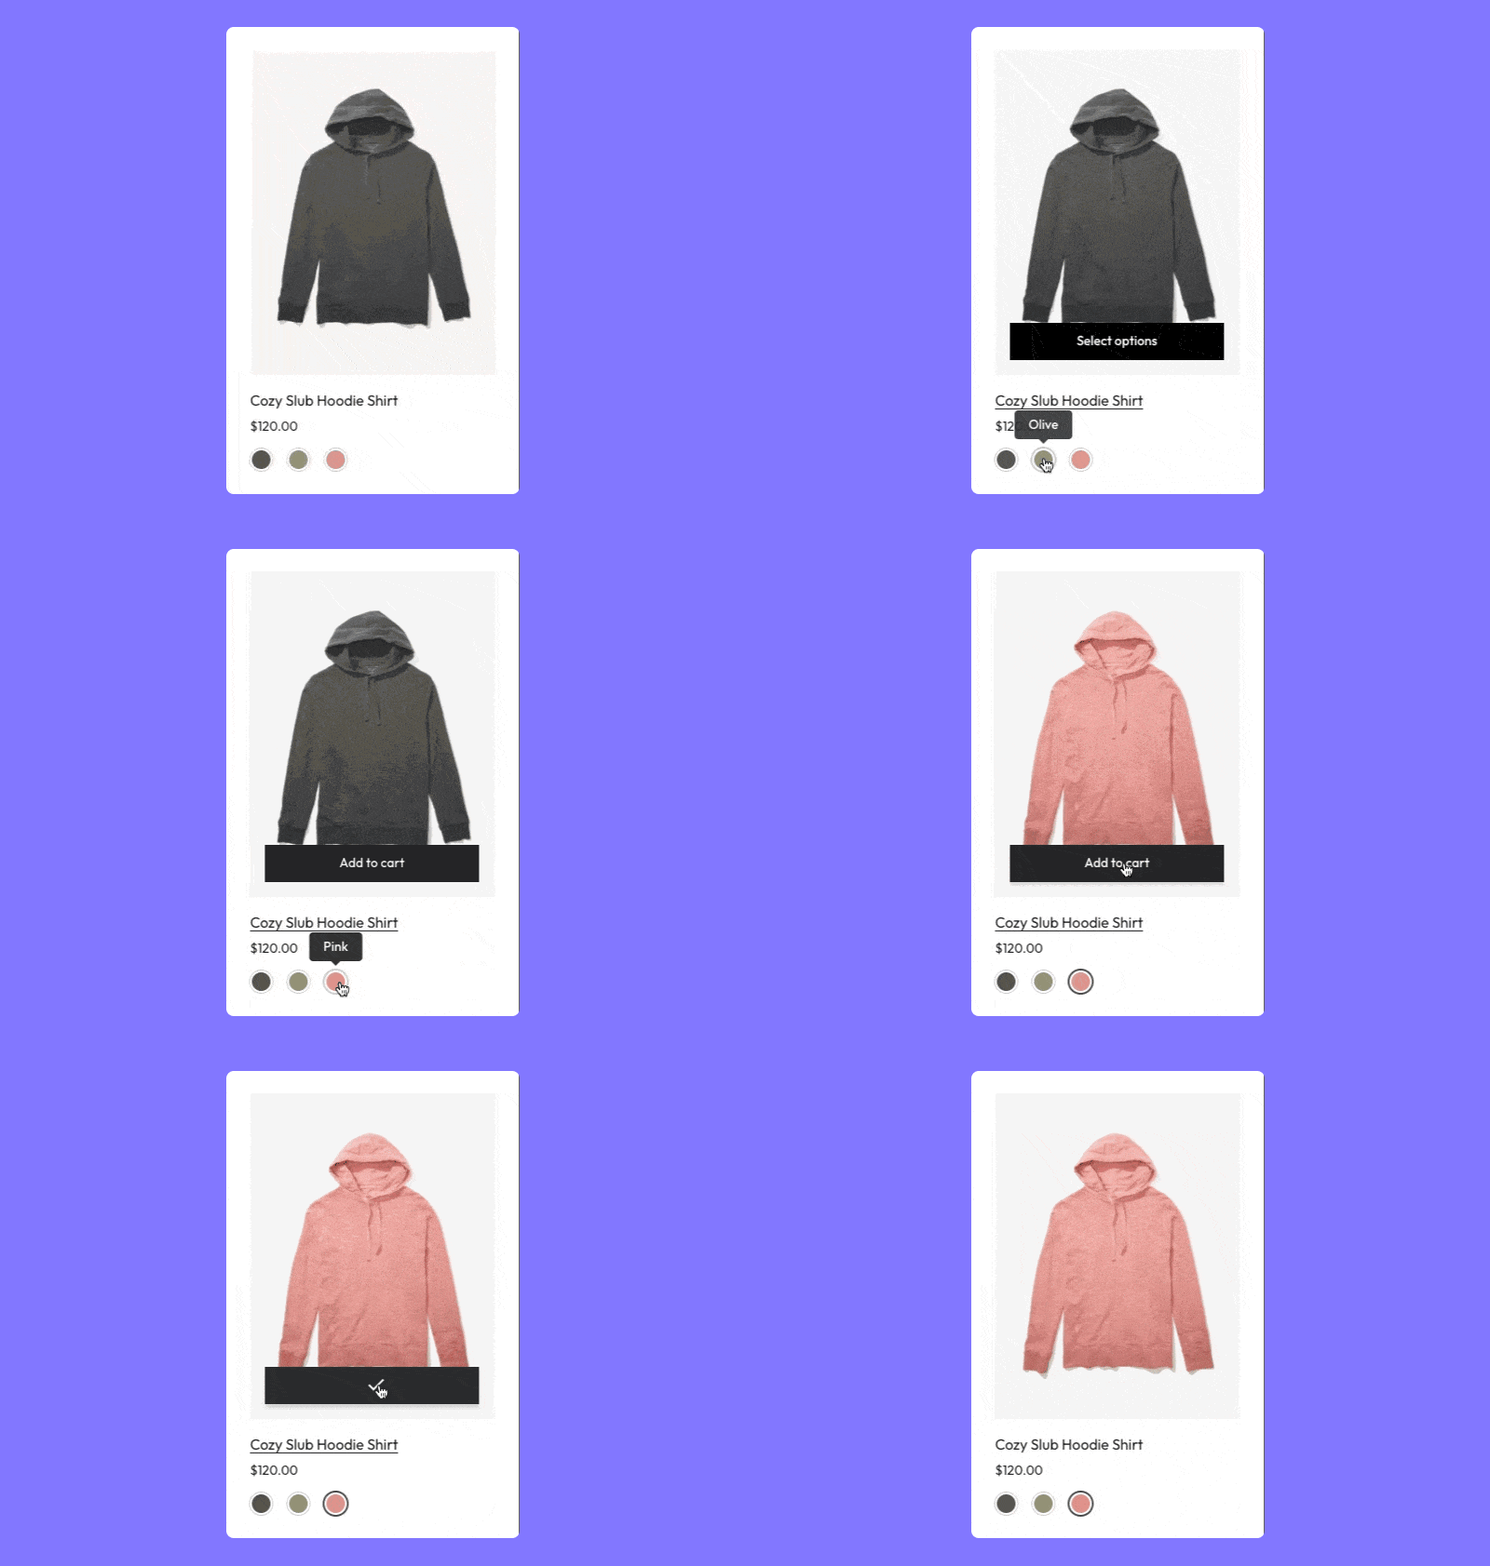
Remember, this works best when all attributes are shown on the shop page. WooCommerce needs all attributes selected to add a specific variation to the cart.
Conclusion
Your customers can now see product variations at a glance, making their shopping experience smoother and potentially boosting your sales. Remember, you can always go back and tweak the plugin’s settings as you see fit. Maybe you’ll find that showing all attributes works better than just one, or perhaps you’ll want to adjust the swatch size. Feel free to experiment and find what works best for your unique store and products.
