WooCommerce color swatches are a great way to display the different color options for your products. In this documentation, you will learn how to set up color swatches for your products using the WCBoost – Variation Swatches plugin.
Table of Contents
Configure Color Swatches for Global Attributes
Global attributes can be used for any product in your store. You can create a global attribute for Colors and use them for all your products that have different colors. To set up color swatches for global attributes, follow these steps:
- Go to Products > Attributes in your WordPress dashboard.
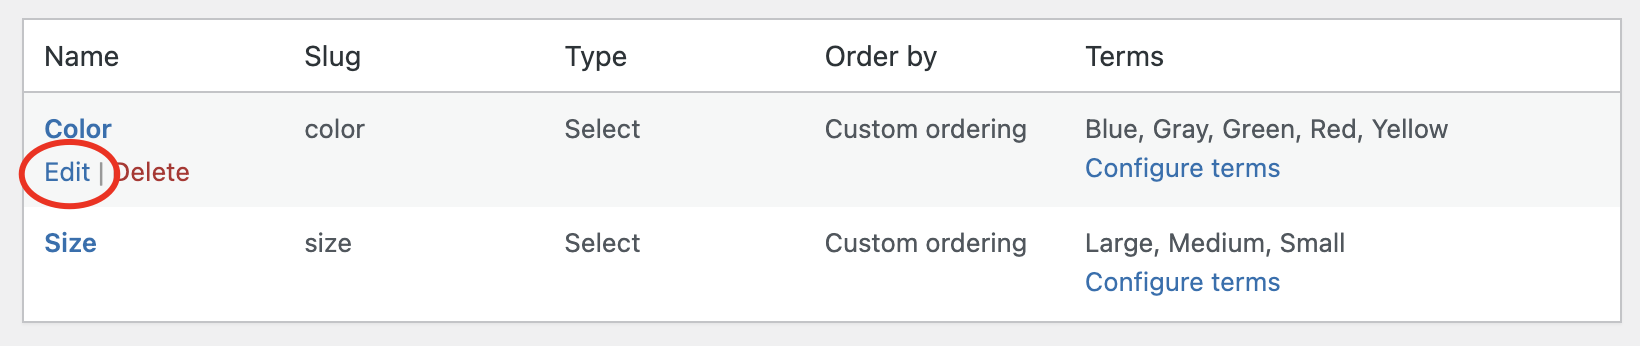
- Create a new attribute or select an existing attribute that you want to configure color swatches for it.
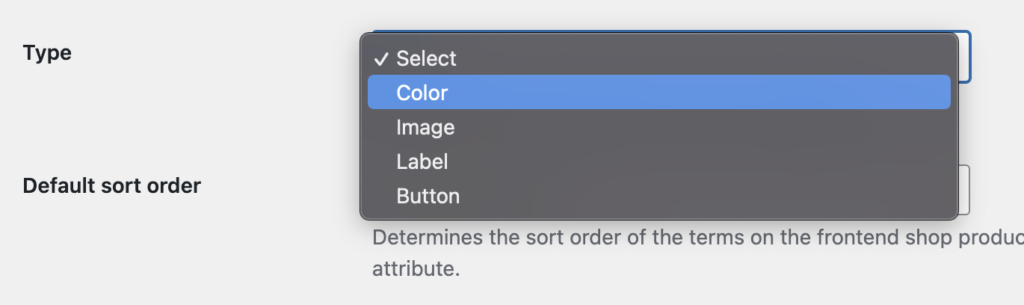
- Under the “Type” dropdown menu, select “Color“. This will enable the color swatch option for this attribute. Click on the Add attribute button (or Save change if you are editing an attribute) to save your attribute.
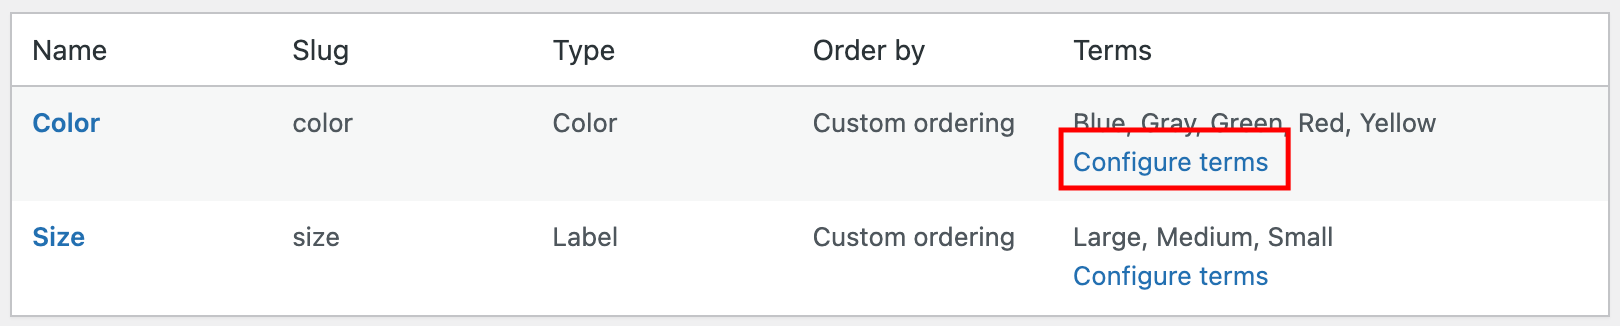
- After creating your attribute, you will see it listed in the table. Click on the Configure terms link under the attribute name to add the color options for this attribute.
- On the next screen, you will see a form to add a new term for your attribute. Enter a name for your color option, such as Red.
Under the Color field, you can select the color for your swatch. You can either use the color picker or enter a hex code for your color. For example, the hex code for red is #FF0000.
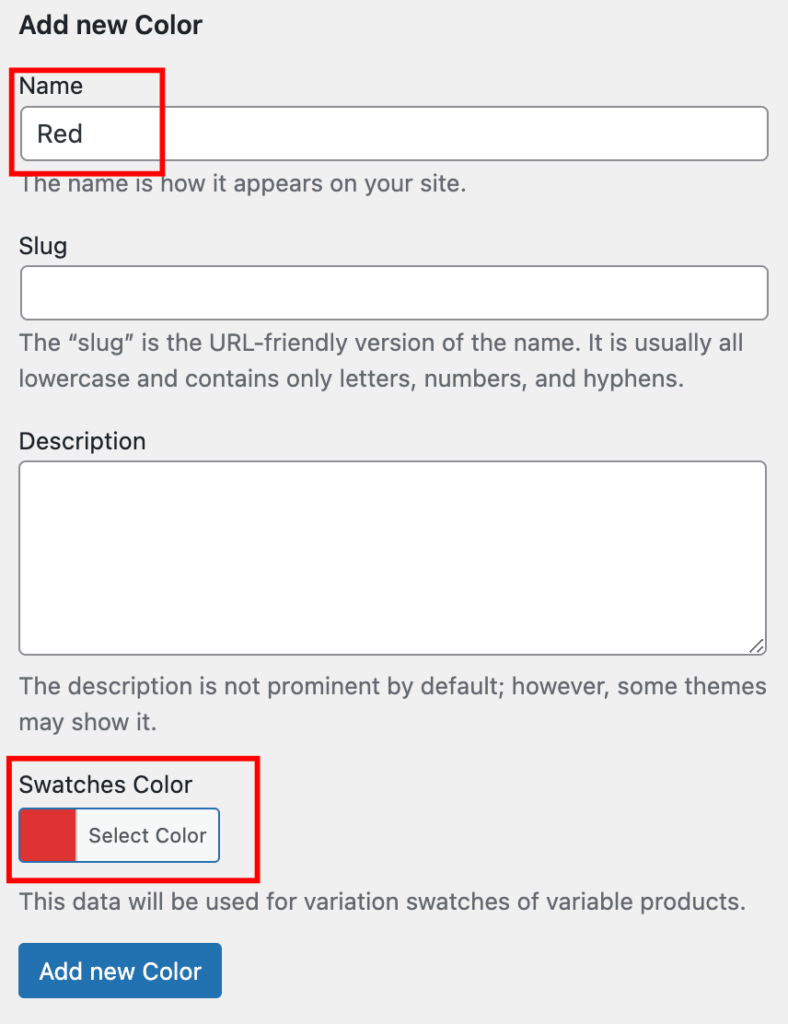
- Click on the Add new Color button to save your color option.
You can repeat the steps above to add more color options for your attribute. You can add as many colors as you want.
Now you have set up color swatches for your global attribute. These color swatches will be automatically applied to any product that uses this attribute. You can also override these color swatches for individual products if you want.
Configuring Color Swatches for Custom Attributes
Custom attributes are specific to individual products. In addition to global attributes, our plugin can help enable color swatches for custom attributes too.
This feature is only available for variable products. In this section, we assume that you are familiar with variable products. If you are new to WooCommerce, please take a look at variable product documentation.
To set up color swatches for custom attributes, you can follow these steps:
- Go to Products > All Products in your WordPress dashboard and edit the variable product that you want to configure color swatches (or create a new product).
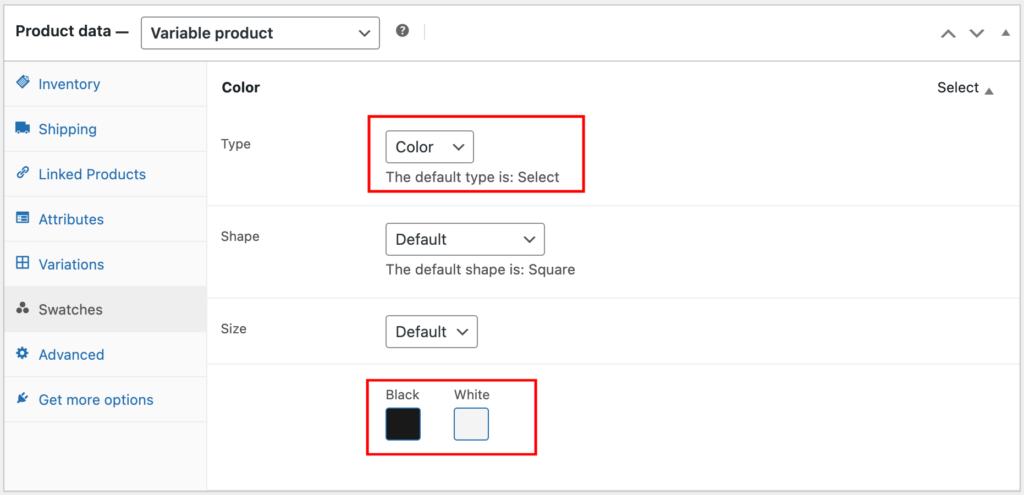
- In the “Product Data” section, open the “Swatches” tab. You will see the list of all attributes that are assigned to the product.
- Select the attribute you want to enable color swatches for. Change the option “Type” to “Color“. The list of attribute terms will appear below. You can pick the color for each of them.
- Once you’ve set colors for all options, scroll to the top of the page. Click the “Update” or “Publish” button to save your changes.
Now you have set up color swatches for custom attributes. These color swatches will be displayed on the product page and allow your customers to choose their preferred product option.
This feature can also be used to adjust the color of a global color attribute for a single product. For example, a product has a color Red, but you don’t want to use the HEX color that was set for this Red attribute term. You can set the Type option to Color again and then you can adjust the Red color to make it darker or lighter, as you prefer.