Image swatches replace default dropdown menus with clickable image swatches, allowing customers to visually select product variations. This documentation will walk you through the process of setting up image swatches using the WCBoost – Variation Swatches plugin.
Configure Image Swatches for Global Attributes
Global attributes can be re-used for multiple products in your store. They’re ideal for consistent attributes like patterns or designs that appear in various product lines.
To set up image swatches for global attributes, follow these steps:
- From the WordPress dashboard, go to “Products > Attributes“.
- Create a new attribute or edit an existing one that you want to display as image swatches.
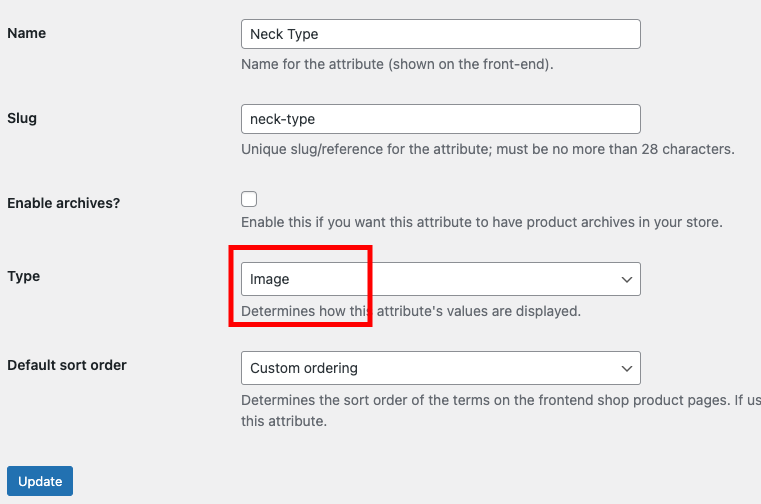
- In the attribute settings, locate the “Type” dropdown and select “Image“. Save your changes to enable image swatches for this attribute.

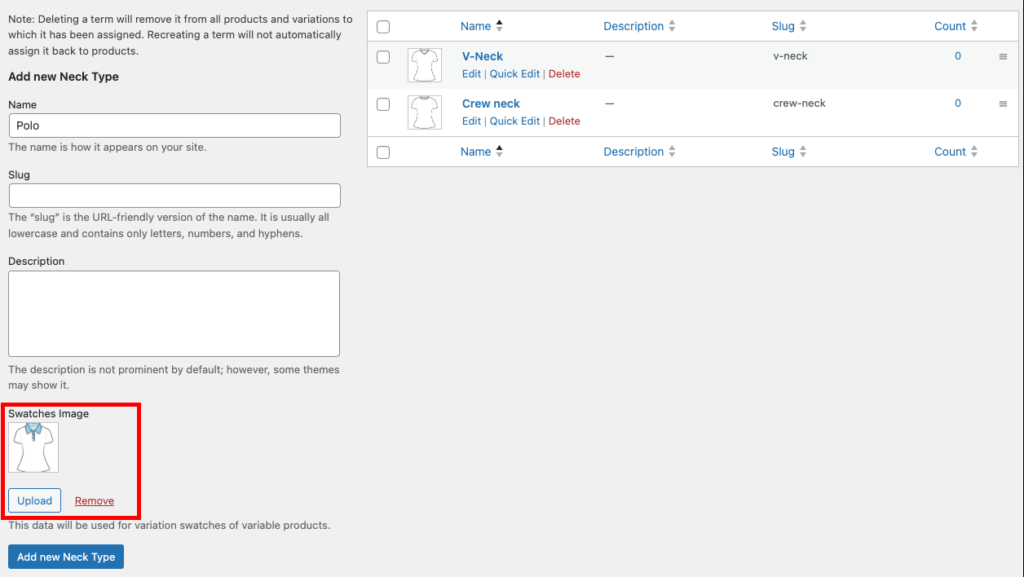
- Next, add options to your attribute by clicking “Configure terms“.

- For each term, provide a name (e.g., “Polo” for the attribute “Neck Type”) and upload a representative image in the Image setting.
- Click on the “Add new” button to save the attribute option.

You can repeat the steps above to add more image options for your attribute.
Now you have set up image swatches for your global attribute. These image swatches will be automatically applied to any product that uses this attribute.
Configure Image Swatches for Custom Attributes
Custom attributes are specific to individual products and are typically used for unique variations that don’t apply to other items in your store.
Our plugin supports converting custom attributes to image swatches. For variable products that require unique image swatches, you can follow these steps to set up image swatches for custom attributes:

- Go to Products > All Products and edit the desired product, or you can create a new product.
- In the “Product Data” section, select the product type as “Variable product”.
- Add custom attributes to your product in the “Attributes” tab.
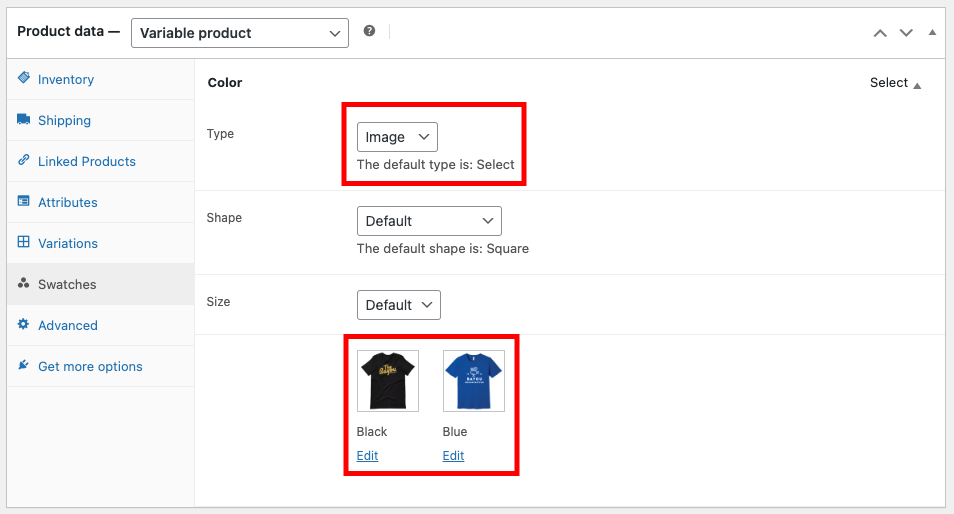
- Open the “Swatches” tab. You will see the list of all attributes that are assigned to the product.
- Find the attribute you want to customize and set its type to “Image”.
- Upload specific images for each attribute option.
- Once you’ve set images for all attribute options, don’t forget to update the product to save your changes.
These image swatches will be displayed on the product page and allow your customers to choose their preferred product option.
This feature can also be used to adjust the image of a global image attribute for a single product. For example, a product has a Color attribute, but you want to use image swatches instead of color swatches for this specific product. You can set the Type option to Image again and then you can upload images for all options of this Color attribute.